...
- Building a port rotation in a voyage estimate requires the prior entry of a vessel and existence of a ballast port. A blank cargo (or parcel) is automatically created in the Cargoes field and added to the calculation when opening a new voyage estimate, but port rotations can be created without a cargo (see To build a port rotation without a cargo (or parcel)).
Note: If no ballast port is automatically retrieved from operations upon vessel name entry or manually entered, the system will automatically recognise the very first entered port call (irrespective of port type) added to the full voyage calculation as ballast port also. The ballast port field will populate accordingly.
Example: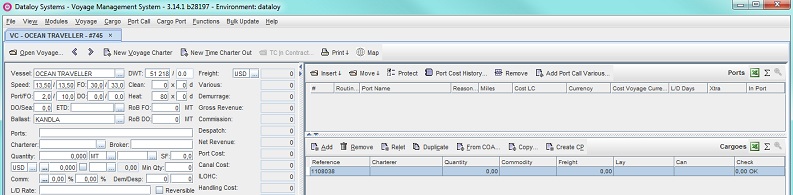
Enter applicable load and discharge ports to the calculation either byAnchor ADVPR2 ADVPR2 - quickkey entry in the Ports field of the Main Calculation field (Cargo panel):
Note: The quickkey option of the Cargo panel Ports field allows quick entries of port rotation and every port call entered is linked to a selected cargo. A minimum of one load and one discharge port must be entered. Manual entries are required for more detailed and complex port rotations.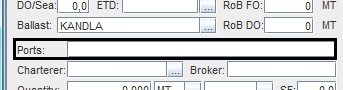
- Fill in as follows:
- Enter all load (L) ports - separated by a dash ("-").
- Enter a forward slash ("/") to indicate end of load ports.
- Enter all discharge (D) ports - separated by a dash ("-").
- Click Enter. The corresponding port rotation will automatically display as rows in the Ports (or Port Rotation) field, including reason for call (L, D, etc.) and the calculated distances between ballast, load and discharge ports, the number of sea days needed for the voyage (Waiting panel, Main calculation field) and in the Cargo Ports field (bottom field) per selected cargo. If the initial port and the ballast port are identical, the distance will list as zero.
Note: An unlimited number of load and discharge ports may be entered, but the quickkey option only allows for the same port call to be entered ONCE on either side of the port call type divider ("/"). If the same port is for example visited twice as a discharge port for the same cargo, the second visit must be entered manually in both the Port Rotation and Cargo Ports (go to Toolbar, Menus, Additional Features (VC)) fields. Further, if the same port is for example visited twice as a discharge port for different cargoes, the second visit will display in the Cargo Ports field for the different cargoes, but must be manually entered Port Rotation field.
Example:
Kandla/Vadinar-Singapore (i.e. load/discharge-discharge)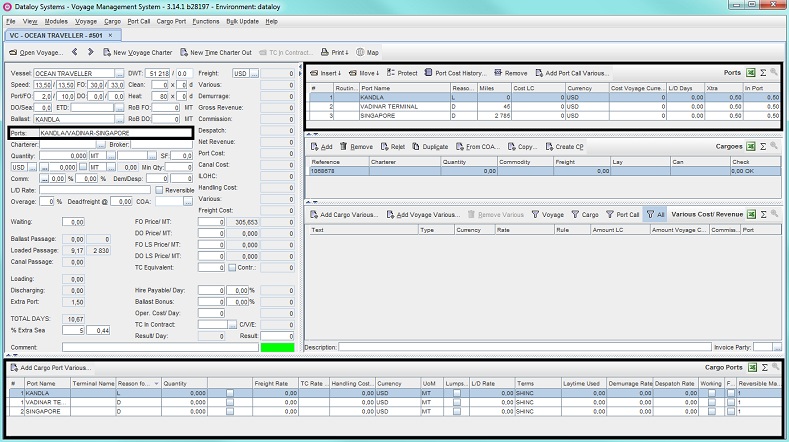
- Go to Step 3.
- Fill in as follows:
or by manual entry into the Ports (or Port Rotation) field:Anchor ADVPR3 ADVPR3 In the Ports (Port Rotation) field, select the port call to add a port call before or after in the rotation - it will highlight. If initial port call is to be entered - go to next step.
- Either
- click Insert and from the menu, depending on where in the new port is to be added, select Before or After
Note: If no previous entry to the Ports field has been made - the Before option will be disabled. Activates after first port call entry. If so, select After.
- or go to the Port Call menu and from the drop-down select Insert and then either Before or After depending on where the new port is to be added.

- click Insert and from the menu, depending on where in the new port is to be added, select Before or After
- The Please Select Port to Insert pop-up will open.
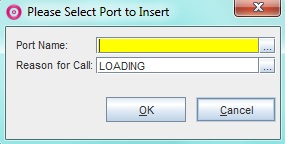
- Fill in the fields as follows:
- Enter either
- the port call name under Port Name or
- click the Triple Dot Selector next to the field. A pop-up with a list of port calls will open. Select port call and click OK.
Example: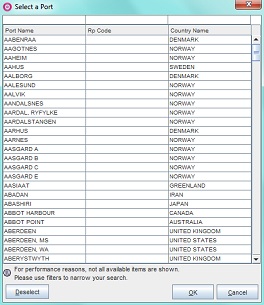
- Enter either
- the reason for call under Reason for Call or
Note: Defaults to Loading. - click the Triple Dot Selector next to the field. A pop-up with a list of input values will open. Select reason for call and click OK.
- the reason for call under Reason for Call or
- Click OK. The pop-up will close and the new port call will display as a row in it's designated place (i.e. before/after the selected port call) in the Ports (or Port Rotation) field, including reason for call (L, D, etc.) and the distances between ballast, load and discharge ports). If the initial port and the ballast port are identical, the distance between will list as zero.
Note: Single Cargo: The load/discharge port is automatically added to the cargo and displays in the Ports field of the Cargo panel and the Cargo Port field per selected cargo. Multiple parcels (or cargoes): Added port call displays only in the Port Rotation field. Dataloy VMS does not automatically recognise which cargo/es the added port call is associated with. Manually added port calls in calculations with two or more cargoes must be manually linked to each respective cargo (see Toolbar, Menus, Additional Features (VC)).
- Enter either
- Repeat as applicable until all load and discharge ports have been entered.
- Go to Step 3.
- quickkey entry in the Ports field of the Main Calculation field (Cargo panel):
The Ports (or Port Rotation) field lists by default load ports and thereafter discharge ports in the order they were entered irrelevant of actual voyage pattern order. Entered port calls will displays as individual rows, each row containing relevant port call data. (Arrange port order into accurate route pattern, go to To rotate/protect port call order).Anchor ADVPR1 ADVPR1
Example:
- The populated row fields can be manually overridden (except #, Cost Voyage Currency, L/D Days and In Port) - edit if applicable:
- List (#) field lists port call order according to reason for call type.
Note: Lists load ports first, thereafter discharge ports in the order were entered, irrelevant of actual voyage pattern order. In case of multiple cargoes the port rotation field will not automatically display correct route pattern (arrange accurate port order, go to To rotate/protect port call order). - Enter applicable routing point (if any) under Routing Point.
Note: Normally populated with elsewhere entered data. - Enter port call name under Port Name.
Note: Will be populated with elsewhere entered data. - Enter reason for call under Reason for Call.
Note: Will be populated with elsewhere entered data. - Miles automatically displays the distance in nautical miles between port calls (retrieved from the DDT).
Note: If the initial port call and the ballast port are identical, the distance will list as zero. All distances can be manually overridden. - Enter port cost in applicable currency under Cost LC (Cost Local Currency).
- Enter port cost currency under Currency.
Note: Defaults to USD. - Cost Voyage Currency displays the port cost in the voyage currency.
- L/D Days (Load/Discharge Days) displays the time allowed to load/discharge (in days).
Note: Calculates based on term entered for load and discharge ports. - Enter the individual extra days estimated to spend in each port under Xtra.
Note: Defaults to 0.5 days. The total of all entered extra time spent in all port will display under Extra Port (Main Calculation field, Turnaround panel). - In Port displays the total number of days in port (i.e. the sum of L/D DAYS and Xtra days).
- List (#) field lists port call order according to reason for call type.
- The populated row fields can be manually overridden (except #, Cost Voyage Currency, L/D Days and In Port) - edit if applicable:
...