Versions Compared

Key

  • This line was added.
  • This line was removed.
  • Formatting was changed.

...

Long Description

Anchor
INTERNAL1
INTERNAL1
Generate, Post and Store Internal Allocations (with Accounting System Integration)

Multiexcerpt
MultiExcerptNameint1
  1. Go to Modules > Accounting > Internal AllocationsThe Internal Allocations window open. 


  2. Generate internal allocations:
    1. Click Generate Internal Allocations... The Choose Parameters for Internal Allocations Generation dialog box opens.

      Example:


    2. Fill in the fields as follows:
      1. Select the month from the drop-down menu and enter the year to run the internal allocations for under Month/Year.
      2. Click the applicable business unit/s under .
        Note: To select several - press the Control (Ctrl) key and click relevant rows.
      3. Click applicable company/ies under .
        Note: Internal allocations will only be generated for selected companies. If none are selected internal allocations will be generated for all.
      4. Enter the vessel class to generate data for a single vessel class (if applicable) under Vessel Class.
      5. Enter either
        1. the vessel code to generate data for a single vessel (if applicable) under Vessel Code
        2. or click the Triple Dot Selector next to the field. A pop-up with a list of input values opens. Select field and click OK

          Example:


      6. Enter either
        1. the voyage generate data for a single voyage (if applicable) under Voyage
        2. or click the Triple Dot Selector next to the field. A pop-up with a list of input values opens. Select field and click OK.

          Example:


    3. Click Generate. A pop-up opens advising the start of generating internal allocation. Generating internal allocations may take a while.


    4. Click OK. The pop-ups will close and the generating of internal allocations commence.
    5. Once the generating of internal allocations is complete, a pop-up opens advising this.


    6. Click OK. The pop-up will close and the generated internal allocations displays as rows in the Pending folder.
  3. Post internal allocations to an accounting system by selective - (selecting the internal allocations to be posted) or batch (posting all internal allocations of selected business unit/s) posting.
    1. Selective posting:
      1. Either
        1. click the internal allocation row/s to be posted - it/they will highlight -
          Note: To select several - press the Control (Ctrl) key and click relevant rows.
        2. or click Select All... to post all listed internal allocations - they will highlight. 
          Note: To deselect - click the Deselect All... button.

          Example:


      2. Click Mark as Ready For Posting. A pop-up opens asking to confirm move.
      3. Click OK. The pop-up will close and the selected internal allocations moves to the Ready For Pending folder until they are sent to an accounting system. This occurs almost immediately. Once sent, the internal allocations automatically moves to the Posted folder for storage.
    1. Batch posting:
      1. Click Batch Post... 

        Example:


      2. A pop-up with a list of  appears. Select business unit/s and click OK.
      3. The pop-up will close and all internal allocations of the selected business unit/s moves from the Pending to the Ready For Pending folder until they are sent to an accounting system. This occurs almost immediately. Once sent, the internal allocations automatically moved to the Posted folder for storage.

The Mark as Posted button SHOULD NOT BE USED where integration with an accounting system exists.

...

  1. Generate internal allocations by following the step-by-step instructions of the To generate, post and store internal allocations (with accounting system integration), Steps 1-2 section above.
  2. Post internal allocations either directly to the Posted folder or first to Ready for Posting if, for example, the internal allocations are to be posted at a later date.
    1. Post directly to the Posted folder:
      1. Either
        1. click the internal allocation row/s to be posted - it/they will highlight - or
          Note: To select several - press the Control (Ctrl) key and click relevant rows.
        2. click Select All... to post all listed internal allocations - they will highlight. 
          Note: To deselect - click the Deselect All... button.
      2. Click Mark as Posted. A pop-up will open asking to confirm move.

        Example:


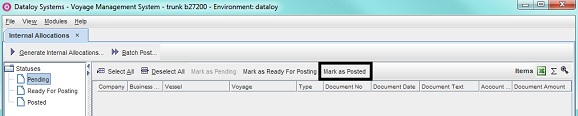
      3. Click OK. The pop-up will close and the selected internal allocations will move to the Posted folder for storage.

    2. Post including the Ready For Posting folder:
      1. Selective posting:
        1. Either:
          1. click the internal allocation row/s to be posted - it/they will highlight - or
            Note: To select several - press the Control (Ctrl) key and click relevant rows.
          2. click Select All... to post all listed internal allocations - they will highlight.
            Note: To deselect - click the Deselect All... button.
        2. Click Mark as Ready For Posting. A pop-up will appear appears asking to confirm move.
        3. Click OK. The pop-up will vanish and the selected internal allocations will move to the Ready For Pending (placed in queue for posting).
        4. Go to Step iii.
      2. Batch posting:
        1. Click Batch Post...
        2. A pop-up with a list of business units will appear appears. Select business unit/s and click OK.
        3. The pop-up will close and all internal allocations of the selected business unit/s will move moves to the Ready For Pending folder (placed in queue for posting).
        4. Go to Step iii.
      3. In the Ready for Pending folder select the internal allocation row/s due to be posted in the queue - it/they will highlight (selective posting).
      4. Click Mark as Posted. A pop-up will open opens asking to confirm move.
      5. Click OK. The pop-up will close and the selected internal allocations will move moves to the Posted folder for storage.

...