Short Description
...
Duplicates an open Voyage Charter or Time Charter Out estimateEstimate.
Duplicate an Estimate:
- Go to
Modules > Voyage Estimate.The Voyage Estimate window opens.
Note: The most recent calculation will by default display. If no previous calculation has been made - the view will be empty. - Open the voyage charter/time charter out calculation to be duplicated. Its fields will display.
- Go to the Voyage menu and from the drop-down select Duplicate.

- The duplicated calculation will display - only difference will be the unique calculation number in the browser tab.
...
Anchor VOY17 VOY17
Post Voyage Analysis
| VOY17 | |
| VOY17 |
The Post Voyage Analysis option generates a Post VC Voyage Analysis report (.i.e. either a Preliminary Report displaying all initial estimates or an Adjusted Report showing a breakdown of all actual results of a voyage upon voyage completion depending on if the report is run on a frozen voyage's preliminary or adjusted calculation). The reports can be run at any time during a voyage and will then display the most current and up-to-date results at the time. Applicable for Actual Voyages (or fixtures) ONLY - option is other wise deactivated. To generate a post voyage analysis, go to Post Voyage Analysis.
Anchor VOY18 VOY18
Remarks and Attachments...
| VOY18 | |
| VOY18 |
The Remarks and Attachments... feature enables various remarks and attachments to be added to a calculation. The entered remarks and attached information is stored in the Remarks and attachments... feature and are for informative purposes ONLY. Note: No attachments can be added without a remark. There are two methods of utilising the feature either by entering a remark and/or attachment to:
- The entire calculation (no indication that remark/attachment have been entered will show in calculation interface) or
- To one or several particular port/cargo/various cost/revenue record/s in the Ports (or Port Rotation), Cargoes, Various Cost/Revenue and Cargo Ports fields respectively, (indication will show beside relevant port/cargo if remark and/or attachment has been added).
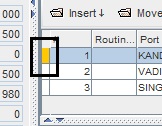
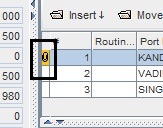
Note: If a remark is added, the record field will change colour to orange, if both remark and attachment is added the record field will both turn orange and display a paperclip symbol.Example:
No remark/attachment Remark added to record Remark and attachment added to record.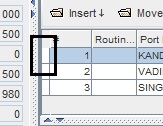
Add a Remark and/or Attachment From the Voyage Menu:
- Go to
Modules > Voyage Estimate.The Voyage Estimate window opens. - Open the calculation (voyage or time charter) to add a remark and/or attachment to. Its fields will display.
- Either
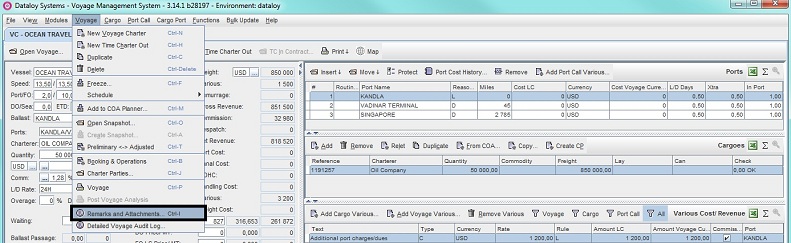
- go to the Voyage menu and from the drop-down select Remarks and Attachments... to add remark/attachment for the entire calculation
- or click the most right-hand field of the record to add a remark/attachment to.
- The Remarks and Attachments... dialogue box opens.
Note: If no previous remarks have been entered, a two field view will display. The attachment field is by default disabled. Activates once a remark is entered. - Click Create New. The layout will change, splitting in three, an upper field for listing of remarks, a middle where remarks are displayed and the lower for adding and listing attachments.
- Enter the subject name under Title/Subject.
- Enter remark in the Remark field below.
- Click Save. A new row will display in the top field stating date entered, remark subject name, name of creator. A remark has been added and the attachment field will activate.
Example: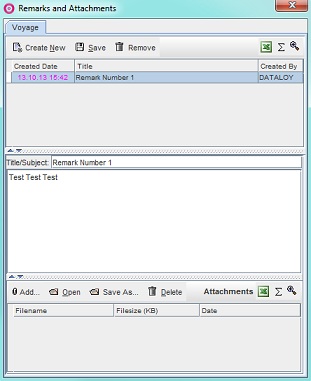
- Add an attachment Attachment (if no attachments are to be added - close the dialogue box):
- Click the remark to add an attachment to – it will highlight.
- In the attachment field click Add.
- From the pop-up that will open locate and select item to be added.
- Click Open. The pop-up will close and the attached item display as a row in the attachment stating name, size and date attached. It is now saved against the remark.
Edit/Delete a Remark:
- Edit a remark:
- Go to
Modules > Voyage Estimate.The Voyage Estimate window opens. - Open the Remarks and Attachments... dialogue box to be edited (calculation or applicable record).
- Edit as appropriate the fields displayed.
- All changes auto-save.
- Go to
- Delete a voyage calculationVoyage Calculation:
- Go to
Modules > Voyage Estimate.The Voyage Estimate window opens. - Open the Remarks and Attachments... dialogue box to be edited (calculation or applicable record).
- Click the remark to be deleted - it will highlight.
- Click Remove. A pop-up opens asking to confirm deletion.
- Click Yes. The pop-up will close and the selected scheduled voyage delete.
- Go to
Delete an attachmentAttachment:
Go to Modules > Voyage Estimate. The Voyage Estimate window opens.
- Open the Remarks and Attachments... dialogue box to be edited (calculation or applicable record).
- Click the remark with the attachment to be deleted - it will highlight.
- Click the attachment to be deleted - it will highlight.
- Click Delete. A pop-up opens asking to confirm deletion.
- Click Yes. The pop-up will close and the selected scheduled voyage delete.
Anchor VOY19 VOY19
Detailed Voyage Audit Log...
| VOY19 | |
| VOY19 |
...
- Go to Modules > Voyage Estimate
.The Voyage Estimate window opens.
Note: The most recent calculation will by default display. If no previous calculation has been made - the view will be empty. - Open the calculation (voyage or time charter) to check audit log for. Its fields will display.
- Go to the Voyage menu and from the drop-down select Detailed Voyage Audit Log....

The Voyage Audit Log dialogue box opens and presents all registered changes, etc.
Example: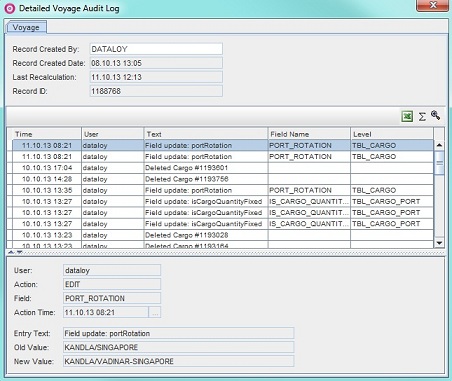
Related Content
| Expand | ||
|---|---|---|
| ||
|