Laytime Calculations (Single Parcel)
Short Description
The two main types of scenarios involving single cargo (or parcels) laytime calculations are Single Charter Party (CP) with single cargo (or parcel) and Single Charter Party (CP) with single cargo (or parcel) using Reversible Terms. For all single cargo voyages without a charter party (CP), Dataloy VMS automatically generates one.
Single Charter Party (CP) with single cargo (or parcel) is the most basic type of laytime calculation, consisting one charter party (CP), one cargo and a minimum of two ports (load and discharge). All laytime calculations are by default treated as "single cargoes". When a laytime calculation is run, all cargo ports of a cargo are calculated individually and the results will accumulate to corresponding fields per cargo and per charter party (CP).
For each port of a particular cargo laytime used and allowed, time deductions/additions, time on demurrage and/or despatch and any demurrage and/or despatch amounts (based on demurrage rate and time on demurrage) are calculated. The total laytime allowed per cargo port do not mix between ports, nor do demurrage and despatch for loading and discharging ports. As a result, even though on port level at either demurrage or despatch can be incurred per port, both demurrage and despatch are possible to incur on Cargo and Charter Party levels, i.e. total incurred demurrage and despatch are not added together but displayed separately. The demurrage/despatch amounts are calculated and accumulated according to the demurrage/despatch rate and time on demurrage/despatch. Demurrage: Laytime Allowed minus Laytime Used (plus/minus the total of all deductions/additions), Despatch: Laytime Used minus Laytime Allowed (plus/minus the total of all deductions/additions). Additional extra time allowed where for example, charterers allow vessels to load prior commencemment of laycan and any time saved prior to laycan can be credited in total laytime allowed, or if a specific amount of extra time is agreed upon in the charter party (CP), the additional time/port is to be added in the calculation as deductions/port.
The Single Charter Party (CP) with single cargo (or parcel) using Reversible Terms calculation differs from a non-reversible by providing the option of totaling all laytime allowed (loading and discharging) for a cargo and requires a minimum of two ports (load and discharge port) relative to terms of applicable charter party/ies. No demurrage becomes payable until the combined times exceed the total time specified for both operations (load/discharge) in included ports, i.e. like specifying a total time to cover both operations at included ports. Reversibility (or reversible laytime) only applies per cargo, i.e. the ports of each cargo are affected per cargo and between load- and discharge ports, but not between load ports or discharge ports. Also, for ports where reversibility is applied, and where all laytime allowed is totalled, either demurrage or despatch is calculated, not both.
Chapters:
Long Description
Single Charter Party (CP), Single Cargo (or Parcel)
- Open the voyage to make a laytime calculation for. Voyages can be opened either directly in the Laytime Calculations module or via the Booking and Operations module.
- Either open a voyage
- directly in Laytime Calculatuions:
- Go to
Modules > Post Fixture > Laytime Calculations.The Laytime Calculations window opens.
- Click Open Voyage... A pop-up with a list of voyages opens.
Note: The list can be filtered if needed by using the filter row above the columns. Click applicable row field, enter search parameter and press Enter. Filter as applicable. - Click the voyage to be opened - it will highlight.
- All ports, all currently available laytime related data (if any) and existing charter party of the selected voyage will display.
- Go to Step 2.
- Go to
- or through Booking and Operations:
- Select applicable vessel in the right-hand upper field - it will highlight. The vessel's details will display across the screen.
- In the Voyage list, select the voyage to be opened - it will highlight.
Either
go to the Voyage menu at the top of the screen and from the drop-down menu select Laytime Calculations

- or in the toolbar, click Laytime.

- The Laytime Calculations module opens on a separate screen holding all ports, all currently available laytime related data (if any) and existing charter party of the selected voyage. The port rotation is listed in the Port Call field (upper, left), the Cargo field (second field from the top) lists all cargo/es for the selected charter party ONLY and the Cargo Port field shows all load and discharge ports for the cargo selected in the Cargo Field.
Example:
Go to Step 2.
- directly in Laytime Calculatuions:
- Either open a voyage
In the Port Calls tab:
Go to the Port Call field (lists voyage port rotation), click the port to perform a laytime calculation for - it will highlight.
Note: By default, the first port of the voyage's rotation is always automatically selected - displaying the cargo pertaining to the port and the so far available laytime data (if any).
Example:
The cargo/es pertaining to selected port displays in the Cargo field. In the Cargo Ports field, all ports related to the displayed cargo will show.
Example:
In the Charter Parties (XXX) tab, review the charter party information in the upper field (Charter Party field). The CP fields will either self-populate with data from the Voyage Estimate and Booking and Operations modules (retrieved when creating the CP) or populate once a laytime calculation is partially made or complete, or when data is manually entered.
Note: (XXX) = displays the port selected in the Port Call field (Port Calls tab) within parenthesis. The Charter Party field lists all charter parties (CP's) for a selected port call ONLY, i.e. only CP's including cargoes to be loaded/discharged at that particular port. However, for single cargo voyages there can only be ONE charter party (CP). The CP is automatically created by the system when the voyage is frozen.
Example:
- In the Port Call Events (XXX) tab:
- Review the port call events field (upper field) that houses the port call events identical for all cargoes in a port: ex. Arrival, Berthed, etc. - to be entered by an Operator. Ensure all relevant port call events are present, note the date for each and go to Step 5. If events are missing or incorrect, add/delete as applicable (pertaining to the cargo and port (in combination):
Note: (XXX) = displays the port selected in the Port Call field (Port Calls tab) within parenthesis.- Add a Port Call Event:
- Move the cursor to the Port Call Events field and right-click.
- From the drop-down menu that opens select Add Event.

- A pop-up with a list of event types opens. Select applicable event and click OK.
Note: Will automatically only display port related (PC) events as all events entered in this field are related to applicable cargo. To add all available PC events in the system, right-click and from the drop-down menu that opens select Add All.
Example:
- From the drop-down menu that opens select Add Event.
- Enter the event start date and time under Date.
Note: Enter date and time as ddmmyytttt, for example: September 17 2014, 08:00, type: "1709140800". This will display as "17.09.14 08:00". - Repeat Steps 4ai 1-2 as applicable until all events related to the specific port and cargo has been entered.
- Move the cursor to the Port Call Events field and right-click.
- Delete a Port Call Event:
- Move the cursor to the port call event row to be removed.
- Right-click and from the drop-down menu that opens select Remove Event. A pop-up opens asking to confirm deletion.
- Click Yes. The pop-up will close and the selected row delete.
- Add a Port Call Event:
- Review the port call events field (upper field) that houses the port call events identical for all cargoes in a port: ex. Arrival, Berthed, etc. - to be entered by an Operator. Ensure all relevant port call events are present, note the date for each and go to Step 5. If events are missing or incorrect, add/delete as applicable (pertaining to the cargo and port (in combination):
- In the Port Calls tab:
- Enter events relevant to the cargo at the particular port in the Events field (bottom, left).
Note: Cargo port events are events specific to a single cargo at a specific port and are NOT used in any laytime calculation, but are important information in a Laytime Statement providing informing what has occurred and when.- Add a (Cargo) Event:
- In the Events (or Cargo Port Events) field click Add.
Note: To add all available PC events in the system, click Add All Events. - A pop-up with a list of event types opens. Select applicable event and click OK.
Note: Will automatically only display cargo related (CP) events as all events entered in this field are related to applicable cargo.
Example:
- The pop-up will close and selected event displays as a populated row in the Events (or Cargo Port Events) field stating event number and type of event, for example, Cargo Loading.
Example:
Event: Cargo Loading
- Enter the event start date and time under Date/Time.
Note: Enter date and time as ddmmyytttt, for example: September 17 2014, 08:00, type: "1709140800". This will display as "17.09.14 08:00". - Repeat Steps 5ai 1-4 as applicable until all events related to the specific port and cargo has been entered.
- In the Events (or Cargo Port Events) field click Add.
- Remove an Event:
- Click the row to be removed - it will highlight.
- Click Remove. A pop-up opens asking to confirm deletion.
- Click Yes. The pop-up will close and the selected row delete.
- Add a (Cargo) Event:
- In the Cargo Port field (second field from bottom), edit as applicable (some fields will self-populate):
- Click applicable port to enter laytime data to - it will highlight.
Note: Initial port will by default always be selected. Review the the Quantity and Terms fields for accuracy.
Note: Populates with elsewhere retrieved data. Both fields are originally entered in either the Voyage Estimate or Booking and Operations modules and are automatically reflected in the Laytime Calculations module. Entered Quantity will in the Cargo Ports field by default display in the first load and discharge ports, but can be split when working with multiple ports. Terms data can be manually overridden, but quantity can only be adjusted in the Booking and Operations module (Cargo tab, Bill of Lading quantity). For a single cargo voyage, it is usually enough to only enter terms on the Cargo Ports field, but in case of total laytime (loading and discharging, especially in tanker scenarios) the total terms must be entered in applicable row field in either the Cargo field or the Charter Party field (Charter Parties tab). The terms in the Cargo Ports field will update accordingly. To add deadfreight to allow for extra time in a laytime calculation by overriding the "Laytime Quantity". To do this, utilise the Laytime Quanity Option.
Example:
- Enter the demurrage rate under Rate Demurrage.
Note: Rates are by default retrieved from the Voyage Estimate or Booking and Operations modules and are by default entered in the Cargo- and Cargo Ports fields. For non-reversible calculations, (where rates vary per port), the rates must also be entered as applicable in the Cargo Port field - except when the Cargo Match function is used. Should then be left blank. - Enter the despatch rate under Rate Despatch.
Note: Rates are automatically retrieved from the Voyage Estimate or Booking and Operations modules and are by default entered in the Cargo- and Cargo Ports fields. For non-reversible calculations, (where rates vary per port), the rates must also be entered as applicable in the Cargo Port field - except when the Cargo Match function is used. Should then be left blank. No rate is entered or despatch calculated for ports with "Free Despatch", i. e. ports that does not allow despatch (then check Free Despatch checkbox for applicable port/s).
Example:
Cargo Ports field - Rate Demurrage/Rate Despatch
- Enter time and date laytime commenced in the row field of the selected port under the Laytime Commenced column.
Note: Enter date and time as ddmmyytttt, for example: September 17 2014, 08:00, type: "1709140800". This will display as "17.09.14 08:00".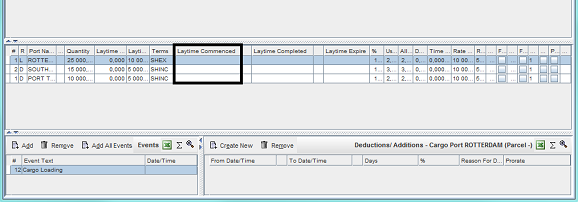
- Click applicable port to enter laytime data to - it will highlight.
- In the Deductions/Additions - Port Call XXX (Parcels -) field, enter all deductions/additions as they occur.
Note: XXX = displays selected port in the Port Call field and indicates the port for which deductions/additions are being made. The (Parcels -) indicates for which cargo deductions/additions are being made - when single cargo: will show as "-". Any deductions/addition applies to the selected cargo port ONLY. Also - in a single CP, single cargo situation as this, it is preferable to add all deductions/additions here, even those applicable to all cargoes of the port (when multiple CP's and cargoes entered in the Port Call Deduction field (Port Call tab), as they will apply to the SINGLE cargo anyway.- To add a deduction:
- Click Create New. A blank deduction row appears.

- Enter the date and time when the deduction commenced in the row field under the From Date/Time column.
Note: Enter date and time as ddmmyytttt, for example: September 17 2014, 08:00, type: "1709140800". This will display as "17.09.14 08:00". - Enter the date and time when the deduction ended in the row field under the To Date/Time column.
Note: Enter date and time as ddmmyytttt, for example: September 17 2014, 08:00, type: "1709140800". This will display as "17.09.14 08:00". - Enter the reason for the deduction in the row field under Reason For Deduction.
Note: Entered reason will display on a Laytime Statement. - Prorate checkbox: LEAVE UNCHECKED.
Note: ONLY applicable with multiple cargoes. - Repeat Steps 5ci 1-5 as applicable until all deductions occurring until laytime is completed has been added.
- Click Recalculate.
Note: No calculations will be made until Recalculate is clicked - it is therefore possible to enter multiple additions without running a calculation, to wait until all additions are entered to click Recalculate and perform a single calculation for all or wait until all details for the entire laytime calculation is entered.
- The number of days for each deduction is separately calculated and will display in each row under the Days column. The total of all deductions is accumulated and is deducted from the total laytime used (updates relevant row fields in both the Cargo and Cargo Port fields).
- Click Create New. A blank deduction row appears.
- Add an Addition:
- Enter the date and time when the addition commenced in the row field under the From Date/Time column.
Note: Enter date and time as ddmmyytttt, for example: September 17 2014, 08:00, type: "1709140800". This will display as "17.09.14 08:00". - Enter the date and time when the addition commenced in the row field under the From Date/Time column.
Note: Enter date and time as ddmmyytttt, for example: September 17 2014, 08:00, type: "1709140800". This will display as "17.09.14 08:00". - Enter a negative percentage in the row field under the % column.
Note: Negative percentage = Adding time.
Example:
Two of four cranes broke down - enter "-50%".< - Enter the reason for the addition in the row field under Reason For Deduction.
Note: Entered reason will display on a Laytime Statement - if printed - Prorate checkbox: LEAVE UNCHECKED.
Note: ONLY applicable with multiple cargoes. - Repeat Steps 5cii 1-5 as applicable until all deductions occurring until laytime is completed has been added.
- Click Recalculate.
Note: No calculations will be made until Recalculate is clicked - it is therefore possible to enter multiple additions without running a calculation, to wait until all additions are entered to click Recalculate and perform a single calculation for all or wait until all details for the entire laytime calculation is entered. - The calculated number of days for each addition will display in each row under the Days column. Also, the total of all additions will be added to the total laytime used.
- Enter the date and time when the addition commenced in the row field under the From Date/Time column.
- Delete a Deduction/Addition:
- Click the deduction/addition row to be removed - it will highlight.
- Click Remove. A pop-up opens asking to confirm deletion.
- Click Yes. The pop-up will close and the selected row delete.
- To add a deduction:
- In the Cargo Ports field:
- Once laytime is complete, enter time and date for laytime completion in the port row field of the selected port under the Laytime Completed column (Cargo Port field).
Note: Enter date and time as ddmmyytttt, for example: for September 17 2014, 08:00, type: "1709140800". This will display as "17.09.14 08:00".
- Once laytime is complete, enter time and date for laytime completion in the port row field of the selected port under the Laytime Completed column (Cargo Port field).
- Enter events relevant to the cargo at the particular port in the Events field (bottom, left).
- Repeat Steps 2-5 at each port of the cargo's port rotation until all relevant laytime data have been entered for all of the cargo's ports.
- Review all entered details and click Recalculate.
Note: No calculations will be made until Recalculate is clicked, yet it can be clicked at any given time while entering data, for example, after entering data for one port or cargo or after entering deductions/additions - or wait until all details for the entire laytime calculation is entered. The calculation will refresh and recalculate to that point the most updated figures. However, the recalculate function will automatically be performed upon closing the Laytime Calculations module.
- The laytime calculation is refreshed and recalculated, updating the following fields (Charter Party tab):
- In the Charter Party field (accumulated from fields in the Cargo- and Cargo Port fields):
Note: The CP field show results for all cargoes accumulated results.- Used displays the accumulated laytime used, i.e. the difference between completed and commenced time.
- Allowed displays the accumulated laytime allowed.
- Deduct displays the accumulated time deducted/added for all the cargo's ports.
- Time Demurrage displays the accumulated time incurred (if any) on demurrage for all the cargo's ports.
- Time Despatch displays the accumulated time incurred (if any) despatch for all the cargo's ports.
- Demurrage displays the total accumulated incurred demurrage amount (if any).
Note: Calculated and accumulated according to the demurrage rate and time on demurrage. - Despatch displays the total accumulated incurred despatch amount (if any).
- In the Cargo field (accumulated from fields in the Cargo Port fields):
Note: Displays results for per cargo accumulated results (i.e. all results for the ports of each cargo).- Used displays the accumulated laytime used, i.e. the difference between completed and commenced time, for all the cargo's ports.
- Allowed displays the accumulated laytime allowed for all the cargo's ports.
- Deduct displays the accumulated time deducted/added for all the cargo's ports.
- Time Demurrage displays the accumulated time incurred (if any) on demurrage for all the cargo's ports.
- Time Despatch displays the accumulated time incurred (if any) despatch for all the cargo's ports.
- Demurrage displays total incurred demurrage amount (if any).
Note: Calculated and accumulated according to the demurrage rate and time on demurrage. - Despatch displays total incurred despatch amount (if any).
Note: The despatch amount is calculated and accumulated according to the despatch rate and time on despatch.
- In the Cargo Ports field for each port:
Note: Displays results for per port and particular port.- Laytime Expire populates in case of demurrage, stating when allowed laytime actually ended.
Note: Actual laytime ended date will show in all ports when using reversible terms, not just in the port it occurred. For information purposes only. - Used displays the laytime used, i.e. the difference between completed and commenced time (and the total of all deductions).
- Allowed displays the laytime allowed.
- Deduct displays how much time was added/deducted.
- Time on Demurrage displays the amount of time/per port incurred (if any) on demurrage or despatch (displays as a negative number).
Note: For each port for a particular cargo time on demurrage or despatch is calculated. The figures are automatically accumulated to, and display in, the Cargo field (Time Demurrage or Time Despatch columns as applicable). Time on Demurrage/Despatch calculation: Laytime Allowed minus Laytime Used plus/minus the total of all deductions and additions (plus if deductions minus additions equals remaining deductions, minus if there are remaining additions). - Rate Demurrage will show the originally entered rate retrieved from the Voyage Estimate or Booking and Operations modules (unless manually overridden).
- Rate Despatch will show the originally entered rate retrieved from the Voyage Estimate or Booking and Operations modules (unless manually overridden).
- Demurrage displays total incurred demurrage amount (if any).
Note: If despatch is incurred – there is no demurrage in the Cargo Ports field - field will be blank.The demurrage amount is calculated according to the demurrage rate and time on demurrage. ALWAYS calculated separately for each port on calculations that are non-reversible, non-prorated and not cargo Matched. - Despatch displays total incurred despatch amount (if any).
Note: If demurrage is incurred – there is no despatch in the Cargo Ports field - field will be blank. The despatch amount is calculated according to the despatch rate and time on despatch. ALWAYS calculated separately for each port on calculations that are non-reversible, non-prorated and not cargo matched. Also, no rate is entered or despatch calculated for ports with "Free Despatch", i. e. ports that does not allow despatch (then check Free Despatch checkbox for applicable port/s).
- Laytime Expire populates in case of demurrage, stating when allowed laytime actually ended.
- In the Deductions/Additions -Port Call XXX (Parcels -) field:
- Days: All deductions/additions recalculates and each row field displays the calculated number time (in days) each deduction/addition lasted.
- Days: All deductions/additions recalculates and each row field displays the calculated number time (in days) each deduction/addition lasted.
- In the Charter Party field (accumulated from fields in the Cargo- and Cargo Port fields):
- The laytime calculation is complete for the cargo. The data (for all ports) of the Cargo Ports fields Used, Allowed, Deduct, Time Demurrage, Time Despatch, Demurrage and Depatch fields will accumulate (separately) for each port to the corresponding fields of both the Cargo field and the Charter Party field in the Charter Parties (XXX) tab. As a result both demurrage and despatch is possible to incur in the Cargo and Charter Party field levels in non-reversible, non-prorated and non-Cargo Matched calculations.
Note: Appropriate fields in the Voyage Estimate and Booking and Operations modules automatically update with the Laytime Calculations module each time the calculation is refreshed and recalculated, i.e. each time Recalculate is clicked.
Example:
Single Charter Party (CP), Single Cargo (or Parcel) - using Reversible Terms
- Open the voyage to make a laytime calculation for. Voyages can be opened either directly in the Laytime Calculations module or via the Booking and Operations module.
- Either open a voyage
- directly in Laytime Calculatuions:
- Go to
Modules > Post Fixture > Laytime Calculations.The Laytime Calculations window opens.
- Click Open Voyage... A pop-up with a list of voyages will open.
Note: The list can be filtered if needed by using the filter row above the columns. Click applicable row field, enter search parameter and press Enter. Filter as applicable. - Click the voyage to be opened - it will highlight.
- All ports, all currently available laytime related data (if any) and existing charter party of the selected voyage will display.
- Go to Step 2.
- Go to
- or through Booking and Operations:
- Select applicable vessel in the right-hand upper field - it will highlight. The vessel's details displays across the screen.
- In the Voyage list, select the voyage to be opened - it will highlight.
Either
go to the Voyage menu at the top of the screen and from the drop-down menu select Laytime Calculations
- or in the toolbar, click Laytime.
- The Laytime Calculations module opens on a separate screen holding all ports, all currently available laytime related data (if any) and existing charter party of the selected voyage. The port rotation is listed in the Port Call field (upper, left), the Cargo field (second field from the top) lists all cargo/es for the selected charter party ONLY and the Cargo Port field shows all load and discharge ports for the cargo selected in the Cargo Field.
Example: Go to Step 2.
- directly in Laytime Calculatuions:
- Either open a voyage
In the Port Calls tab:
Go to the Port Call field (lists voyage port rotation), click the port to perform a laytime calculation for - it will highlight.
Note: By default, the first port of the voyage's rotation is always automatically selected - displaying the cargo pertaining to the port and the so far available laytime data (if any).
Example:The cargo/es pertaining to selected port displays in the Cargo field. In the Cargo Ports field, all ports related to the displayed cargo will show.
Example:
In the Charter Parties (XXX) tab, review the charter party information in the upper field (Charter Party field). The CP fields will either self-populate with data from the Voyage Estimate and Booking and Operations modules (retrieved when creating the CP) or populate once a laytime calculation is partially made or complete, or when data is manually entered.
Note: (XXX) = displays the port selected in the Port Call field (Port Calls tab) within parenthesis. The Charter Party field lists all charter parties (CPs) for a selected port call ONLY, i.e. only CPs including cargoes to be loaded/discharged at that particular port. However, for single cargo voyages there can only be ONE charter party (CP). The CP is automatically created by the system when the voyage is frozen.
Example:- In the Port Call Events (XXX) tab:
- Review the port call events field (upper field) that houses the port call events identical for all cargoes in a port: ex. Arrival, Berthed, etc. - to be entered by an Operator. Ensure all relevant port call events are present, note the date for each and go to Step 5. If events are missing or incorrect, add/delete as applicable (pertaining to the cargo and port (in combination):
Note: (XXX) = displays the port selected in the Port Call field (Port Calls tab) within parenthesis.- Add a Port Call Event:
- Move the cursor to the Port Call Events field and right-click.
- From the drop-down menu that opens select Add Event.
- A pop-up with a list of event types opens. Select applicable event and click OK.
Note: Will automatically only display port related (PC) events as all events entered in this field are related to applicable cargo. To add all available PC events in the system, right-click and from the drop-down menu that opens select Add All.
Example:
- From the drop-down menu that opens select Add Event.
- Enter the event start date and time under Date.
Note: Enter date and time as ddmmyytttt, for example: September 17 2014, 08:00, type: "1709140800". This will display as "17.09.14 08:00". - Repeat Steps 4ai 1-2 as applicable until all events related to the specific port and cargo has been entered.
- Move the cursor to the Port Call Events field and right-click.
- Delete a Port Call Event:
- Move the cursor to the port call event row to be removed.
- Right-click and from the drop-down menu that opens select Remove Event. A pop-up opens asking to confirm deletion.
- Click Yes. The pop-up will close and the selected row delete.
- Add a Port Call Event:
- Review the port call events field (upper field) that houses the port call events identical for all cargoes in a port: ex. Arrival, Berthed, etc. - to be entered by an Operator. Ensure all relevant port call events are present, note the date for each and go to Step 5. If events are missing or incorrect, add/delete as applicable (pertaining to the cargo and port (in combination):
- In the Port Calls tab:
- Enter events relevant to the cargo at the particular port in the Events field (bottom, left).
Note: Cargo port events are events specific to a single cargo at a specific port and are NOT used in any laytime calculation, but are important information in a Laytime Statement providing informing what has occurred and when.- Add a (Cargo) Event:
- In the Events (or Cargo Port Events) field click Add.
- Note: To add all available PC events in the system, click Add All Events.
- A pop-up with a list of event types opens. Select applicable event and click OK.
Note: Will automatically only display cargo related (CP) events as all events entered in this field are related to applicable cargo.Example: - The pop-up will close and selected event displays as a populated row in the Events (or Cargo Port Events) field stating event number and type of event, for example, Cargo Loading.
Example:
Event: Cargo Loading - Enter the event start date and time under Date/Time.
Note: Enter date and time as ddmmyytttt, for example: September 17 2014, 08:00, type: "1709140800". This will display as "17.09.14 08:00". - Repeat Steps 5ai 1-5 as applicable until all events related to the specific port and cargo has been entered.
- Remove an Event:
- Click the row to be removed - it will highlight.
- Click Remove. A pop-up opens asking to confirm deletion.
- Click Yes. The pop-up will close and the selected row delete.
- Add a (Cargo) Event:
- In the Cargo field:
- Rate Demurrage and Rate Despatch are by default populated with data retrieved from the Voyage Estimate or Booking and Operations modules.
Note: No rate is entered or despatch calculated for ports with "Free Despatch", i. e. ports that does not allow despatch (then check Free Despatch checkbox for applicable port/s). - Leave Demurrage and Despatch fields blank as reversible terms will be used.
- Check Reversible to activate the reversible terms option.
Note: Reversible terms = the adding together of the time allowed for loading and discharging cargo at included ports and that the calculated demurrage and despatch in the included ports (option applied to) be totalled. By default all in a cargo's port rotation, but can be manually altered.The option requires a minimum of two ports on the cargo's port rotation (load and discharge port). No demurrage becomes payable until the total of all laytime allowed of included ports expires, i.e. like specifying a total time to cover both operations (loading and discharging) at these ports. The reversible terms option is only usable if allowed by the terms of the cargo’s charter party.
Example:

- Rate Demurrage and Rate Despatch are by default populated with data retrieved from the Voyage Estimate or Booking and Operations modules.
- In the Cargo Port field (below Cargo field):
- Click applicable port to enter laytime data to - it will highlight.
Note: Initial port will by default always be selected. - Review the the Quantity and Terms fields for accuracy.
Note: Populates with elsewhere retrieved data. Both fields are originally entered in either the Voyage Estimate or Booking and Operations modules and are automatically reflected in the Laytime Calculations module. Entered Quantity will in the Cargo Ports field by default display in the first load and discharge ports, but can be split when working with multiple ports. Terms data can be manually overridden, but quantity can only be adjusted in the Booking and Operations module (Cargo tab, Bill of Lading quantity). For a single cargo voyage, it is usually enough to only enter terms on the Cargo Ports field, but in case of total laytime (loading and discharging, especially in tanker scenarios) the total terms must be entered in applicable row field in either the Cargo field or the Charter Party field (Charter Parties tab). The terms in the Cargo Ports field will update accordingly.
Example: - Enter time and date laytime commenced in the row field of the selected port under the Laytime Commenced column.
Note: Enter date and time as ddmmyytttt, for example: September 17 2014, 08:00, type: "1709140800". This will display as "17.09.14 08:00".
Example: - Rate Demurrage self-populates with the demurrage rate entered in the Voyage Estimate or Booking and Operations modules. IGNORE - will go blank once laytime is calculated as reversible terms are used.
- Rate Despatch self-populates with the despatch rate entered in the Voyage Estimate or Booking and Operations modules. IGNORE - will go blank once laytime is calculated as reversible terms are used.
Note: No rate is entered for ports with "Free Despatch", i. e. ports that does not allow despatch (then check Free Despatch checkbox for applicable port/s). - Review the Reversible Match column - edit as/if applicable:
- Click cargo port row field to be edited under the Reversible Match column.
- Enter reversible match calculation number.
Note: The Reversible Match column indicates which ports are to be calculated together and activates when Reversible is checked in the cargo row field of the Cargo field. All row fields under the column defaults to 1 for all cargo ports, i.e. to include the cargo's complete port rotation, but each can be manually overridden. The Reversible Match function applies when there are three or more ports in a cargo's port rotation. By default all are numbered 1, i.e. calculated together. However, if for example, a combination reads 1-2-2, the first port will be calculated separately and the other two together. How the ports of the rotation will be calculated therefore depends on the chosen Reversible Match combination. In non-reversible calculations, the number 1 will show but is deactivated from inclusion in any calculations. - Repeat as applicable until complete correct reversible match calculation combination is applied to all applicable ports.
Example:
reversible match calculation combination: 1-1-1 (default)
- Click applicable port to enter laytime data to - it will highlight.
- In the Deductions/Additions - Port Call XXX (Parcels -) field:
- Enter all deductions/additions as they occur.
Note: XXX = displays selected port in the Port Call field and indicates the port for which deductions/additions are being made. The (Parcels -) indicates for which cargo deductions/additions are being made - when single cargo: will show as "-". Any deductions/addition applies to the selected cargo port ONLY. Also - in a single CP, single cargo situations, it is preferable to add all deductions/additions here, even those applicable to all cargoes of the port (when multiple CP's and cargoes entered in the Port Call Deduction field (Port Call tab), as they will apply to the single (ONLY) cargo anyway.- Add a Deduction:
- Click Create New. A blank deduction row appears.
- Enter the date and time when the deduction commenced in the row field under the From Date/Time column.
Note: Enter date and time as ddmmyytttt, for example: September 17 2014, 08:00, type: "1709140800". This will display as "17.09.14 08:00". - Enter the date and time when the deduction ended in the row field under the To Date/Time column.
Note: Enter date and time as ddmmyytttt, for example: September 17 2014, 08:00, type: "1709140800". This will display as "17.09.14 08:00". - Enter the reason for the deduction in the row field under Reason For Deduction.
Note: Entered reason will display on a Laytime Statement. - Prorate checkbox: LEAVE UNCHECKED.
Note: ONLY applicable with multiple cargoes. - Repeat Steps 5di1 a-e as applicable until all deductions occurring until laytime is completed has been added.
- Click Recalculate.
Note: No calculations will be made until Recalculate is clicked - it is therefore possible to enter multiple additions without running a calculation, to wait until all additions are entered to click Recalculate and perform a single calculation for all or wait until all details for the entire laytime calculation is entered. - The entered laytime details will calculate. The number of days for each deduction is separately calculated and will display in each row under the Days column. The total of all deductions is accumulated and is deducted from the total laytime used (updates relevant row fields in both the Cargo and Cargo Port fields).
- Click Create New. A blank deduction row appears.
- Add an Addition:
- Enter the date and time when the addition commenced in the row field under the From Date/Time column.
Note: Enter date and time as ddmmyytttt, for example: September 17 2014, 08:00, type: "1709140800". This will display as "17.09.14 08:00". - Enter the date and time when the addition ended in the row field under the To Date/Time column.
Note: Enter date and time as ddmmyytttt, for example: September 17 2014, 08:00, type: "1709140800". This will display as "17.09.14 08:00". - Enter a negative percentage in the row field under the % column.
Note: Negative percentage = Adding time.
Example:
Two of four cranes broke down - enter "-50%". - Enter the reason for the addition in the row field under Reason For Deduction.
Note: Entered reason will display on a Laytime Statement - if printed - Prorate checkbox: LEAVE UNCHECKED.
Note: ONLY applicable with multiple cargoes. - Repeat Steps 5di2 a-e as applicable until all deductions occurring until laytime is completed has been added.
- Click Recalculate.
Note: No calculations will be made until Recalculate is clicked - it is therefore possible to enter multiple additions without running a calculation, to wait until all additions are entered to click Recalculate and perform a single calculation for all or wait until all details for the entire laytime calculation is entered. - The calculated number of days for each addition will display in each row under the Days column. Also, the total of all additions will be added to the total laytime used.
- Enter the date and time when the addition commenced in the row field under the From Date/Time column.
- Delete a Deduction/Addition:
- Click the deduction/addition row to be removed - it will highlight.
- Click Remove. A pop-up opens asking to confirm deletion.
- Click Yes. The pop-up will close and the selected row delete.
- Add a Deduction:
- Enter all deductions/additions as they occur.
- In the Cargo Ports field:
- Once laytime is complete, enter time and date for laytime completion in the port row field of the selected port under the Laytime Completed column (Cargo Port field).
Note: Enter date and time as ddmmyytttt, for example: for September 17 2014, 08:00, type: "1709140800". This will display as "17.09.14 08:00".
Example:

- Once laytime is complete, enter time and date for laytime completion in the port row field of the selected port under the Laytime Completed column (Cargo Port field).
- Enter events relevant to the cargo at the particular port in the Events field (bottom, left).
- Repeat Steps 2-5 at each port of the cargo's port rotation until all relevant laytime data have been entered for all of the cargo's ports.
- Review all entered details and click Recalculate.
Note: No calculations will be made until Recalculate is clicked, yet it can be clicked at any given time while entering data, for example, after entering data for one port or cargo or after entering deductions/additions - or wait until all details for the entire laytime calculation is entered. The calculation will refresh and recalculate to that point the most updated figures. However, the recalculate function will automatically be performed upon closing the Laytime Calculations module. The laytime calculation is refreshed and recalculated, updating the following fields (Charter Party tab):
In the Charter Party field (accumulated from fields in the Cargo- and Cargo Port fields):
Note: The CP field show results for all cargoes accumulated results.- Used displays the accumulated laytime used, i.e. the difference between completed and commenced time.
- Allowed displays the accumulated laytime allowed.
- Deduct displays the accumulated time deducted/added for all the cargo's ports.
- Time Demurrage displays the accumulated time incurred (if any) on demurrage for all the cargo's ports.
Note: If despatch is incurred (demurrage minus despatch plus/minus deductions/additions), the Time Demurrage field will go blank as reversible terms are used. - Time Despatch displays the accumulated time incurred (if any) despatch for all the cargo's ports.
Note: If demurrage is incurred (demurrage minus despatch plus/minus deductions/additions), the Time Despatch field will go blank as reversible terms are used. - Demurrage displays the total accumulated incurred demurrage amount (if any).
Note: If demurrage is incurred – there is no despatch as reversible terms are used.The demurrage amount is calculated and accumulated according to the demurrage rate and time on demurrage. - Despatch displays the total accumulated incurred despatch amount (if any).
Note: If despatch is incurred – there is no demurrage as reversible terms are used. The despatch amount is calculated and accumulated according to the despatch rate and time on demurrage.
- In the Cargo field (accumulated from fields in the Cargo Port fields):
Note: Displays results for per cargo accumulated results (i.e. all results for the ports of each cargo).- Used displays the accumulated laytime used, i.e. the difference between completed and commenced time, for all the cargo's ports listed in the Cargo Ports field.
- Allowed displays the accumulated laytime allowed for all the cargo's ports listed in the Cargo Ports field.
- Deduct displays the accumulated time deducted/added for all the cargo's ports listed in the Cargo Ports field.
- Time Demurrage displays the accumulated time incurred (if any) on demurrage for all the cargo's ports.
Note: If despatch is incurred (demurrage minus despatch plus/minus deductions/additions), the Time Demurrage field will go blank as reversible terms are used. - Time Despatch displays the accumulated time incurred (if any) despatch for all the cargo's ports.
Note: If demurrage is incurred (demurrage minus despatch plus/minus deductions/additions), the Time Despatch field will go blank as reversible terms are used. - Demurrage displays total incurred demurrage amount (if any).
Note: If demurrage is incurred – there is no despatch as reversible terms are used. The demurrage amount is calculated and accumulated according to the demurrage rate and time on demurrage. - Despatch displays total incurred despatch amount (if any).
Note: If despatch is incurred – there is no demurrage as reversible terms are used. The despatch amount is calculated and accumulated according to the despatch rate and time on despatch.
- In the Cargo Ports field for each port:
Note: Displays results for per port and particular port.- Laytime Expire populates in case of demurrage, stating when allowed laytime actually ended.
Note: Actual laytime ended date will show in all ports when using reversible terms, not just in the port it occurred. For information purposes only. - Used displays the laytime used, i.e. the difference between completed and commenced time (and the total of all deductions).
- Allowed displays the laytime allowed.
- Deduct displays how much time was added/deducted.
- Time on Demurrage displays the amount of time/per port incurred (if any) on demurrage or despatch (displays as a negative number).
Note: For each port for a particular cargo time on demurrage or despatch is calculated. The figures are automatically accumulated to, and display in, the Cargo field (Time Demurrage or Time Despatch columns as applicable). Time on Demurrage/Despatch calculation: Laytime Allowed minus Laytime Used plus/minus the total of all deductions and additions (plus if deductions minus additions equals remaining deductions, minus if there are remaining additions). - Rate Demurrage will go blank as reversible terms are used.
- Rate Despatch will go blank as reversible terms are used.
- Demurrage displays total incurred demurrage amount (if any).
Note: If despatch is incurred – there is no demurrage in the Cargo Ports field - field will be blank. - Despatch displays total incurred despatch amount (if any).
Note: If demurrage is incurred – there is no despatch in the Cargo Ports field - field will be blank.
- Laytime Expire populates in case of demurrage, stating when allowed laytime actually ended.
- In the Deductions/Additions -Port Call XXX (Parcels -) field:
- Days: All deductions/additions recalculates and each row field displays the calculated number time (in days) each deduction/addition lasted.
- Days: All deductions/additions recalculates and each row field displays the calculated number time (in days) each deduction/addition lasted.
The laytime calculation is complete.
Note: Appropriate fields in the Voyage Estimate and Booking and Operations modules automatically update with the Laytime Calculations module each time the calculation is refreshed and recalculated, i.e. each time Recalculate is clicked.
Example: