Multiple Parcels
- Former user (Deleted)
- Erik Fritz Loy
Short Description
The Voyage Estimate module enables a user to perform voyage charter calculations for voyages with a single parcel (or cargo) and for voyages with two or more cargoes (or multiple parcels). An unlimited number of cargoes can be added to a voyage and are listed in the Cargoes field in the order they were entered (except relets, transshipment and preshipment). Each cargo is defined by a unique reference code.
Adding a cargo will result in the Cargo panel (Main Calculation field) to go blank - i.e. displaying the empty fields of the newly entered cargo, ready to be filled in. Entered port calls will be added as applicable to the Ports (or Port Rotation) field and each cargo's individual load and discharge ports are sorted into the Cargo Ports field, visible when the cargo they are associated with is selected.
The Create CP (Charter Party) option enables a user to create a charter party to group multiple cargo/es into a CP (frozen voyage calculations ONLY).
Chapters:
Long Description
Add Additional Cargo/es
- Go to
Modules > Voyage Estimate.The Voyage Estimate window opens.
Note: The most recent calculation will by default display. If no previous calculation has been made - the view will be empty. - Open the voyage charter calculation to add cargo/es to. Its fields will display.
Note: When opening a new voyage estimate tab, a blank cargo is automatically created in the Cargoes field and added to the estimate. If creating a new voyage calculation follow the step-by-step instructions of Create a Voyage Charter calculation/estimate, Step 1-3 FIRST, (also Step 4 if cargo port data modification is needed). - Add additional cargo/es to the voyage either by
entering a new cargo
- Either
- click Add
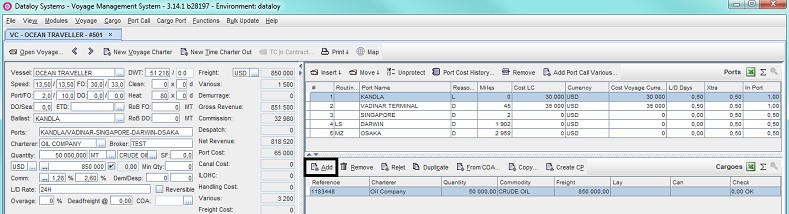
- or go to the Cargo menu and from the drop-down select Add.

- click Add
- A blank cargo row displays in the Cargo field and the Cargo panel of the Main Calculation field will go blank. The Cargo Ports field will empty (i.e. showing the empty fields of the newly entered cargo, ready to be filled in).
Example:

iii. Go to Step 4.- Either
- or by duplicating a cargo in the Cargo field:
- Click the cargo row to be duplicated - it will highlight.
- Either
- click Duplicate
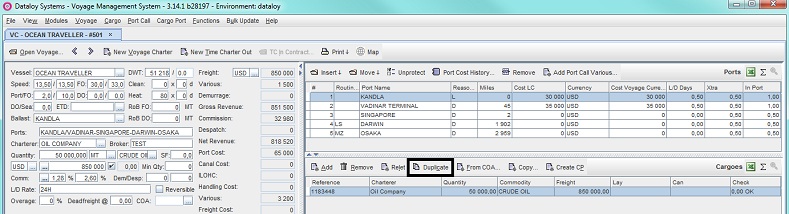
- or go to the Cargo menu and from the drop-down select Duplicate.

- click Duplicate
- Either
- A pop-up opens asking to confirm duplication.
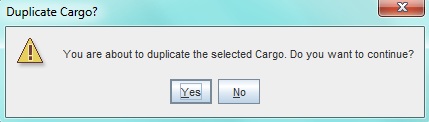
- Click Yes. The duplicated cargo will display and hold the same data (in the Cargo field row, Cargo panel and Cargo Ports field) as the voyage it was duplicated from - except the cargo reference number (unique for each cargo) located under the Reference column of the Cargo field.
- Go to Step 4.
- Click the cargo row to be duplicated - it will highlight.
- or copy a an existing cargo from the Copy/Move Cargo dialogue box:
- Either
- click Copy
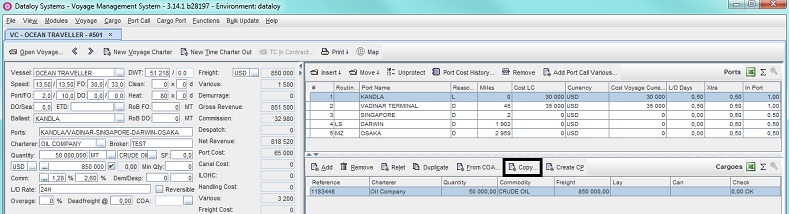
- or go to the Cargo menu and from the drop-down select Copy.

- click Copy
A pop-up with a list of previously entered cargoes opens.
Example: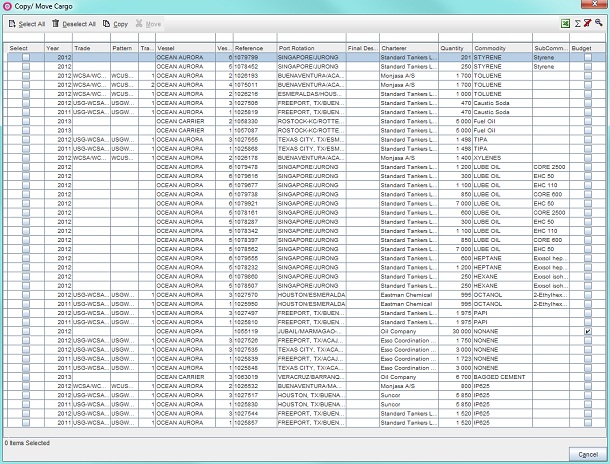
- Either
- check the cargo or cargoes to be copied under the Select column
Note: Uncheck to deselect. - or click Select All to check all cargoes under the Select column to be copied.
Note: Click Deselect to uncheck all selected cargoes.
- check the cargo or cargoes to be copied under the Select column
- Click Copy once applicable cargo/es selection is complete.
Note: Move is ALWAYS deactivated for estimates and ONLY activates for scheduled voyages. The function enables the move of a cargo/es from one actual voyage to another. Cargoes CANNOT be moved to estimates, only copied. - The pop-up will close and the copied cargo/es displays holding the same data (in the Cargo field row/s, Cargo panel and Cargo Ports field) as the cargo/es it/they was/were copied from - except the cargo reference number (unique for each cargo) located under the Reference column of the Cargo field.
- Go to Step 4.
- Either
- or by duplicating a cargo in the Cargo field:
- Enter relevant cargo details for the new cargo in the Cargo panel (Main Calculation field) by following the step-by-step instructions of Create a Voyage Charter calculation/estimate, Step 3b (also Step 4 if cargo port data modification is needed). Added port calls will be added as applicable to the Ports (or Port Rotation) and Cargo Ports fields. Duplicated and copied cargoes: edit as applicable.
- Cargoes are listed in the Cargoes field in the order they are entered (except relets, transshipment and preshipment). Entered cargoes display as individual rows, each row containing relevant cargo data.
Example: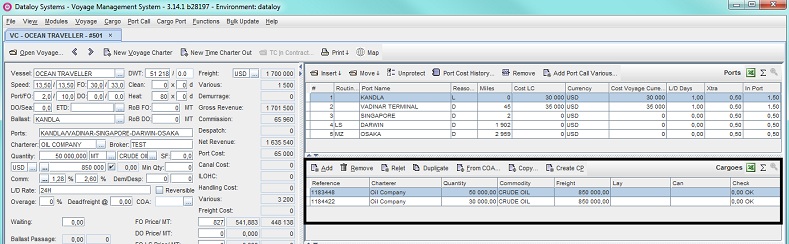
- Repeat as applicable until cargoes with all relevant details have been added.
Edit/Delete a Cargo
- Edit a Cargo:
- Go to
Modules > Voyage Estimate.The Voyage Estimate window opens. - Open applicable voyage calculation to be edited - it will display.
- In the Cargo field click the cargo row to be edited - it will highlight.
- Edit cargo row fields as applicable.
- The estimate recalculates and updates. All changes auto-save.
- Go to
- Delete a Cargo:
- Go to
Modules > Voyage Estimate.The Voyage Estimate window opens. - Open applicable voyage calculation to be edited - it will display.
- In the Cargo field click the cargo row to be edited - it will highlight.
- Either
- click Remove

- or go to the Cargo menu and from the drop-down select Remove.

- click Remove
- A pop-up opens asking to confirm deletion.
- Click Yes. The pop-up will close and the selected scheduled cargo delete.
- The estimate recalculates and updates. All changes auto-save.